

Setting
up a widget for social media icons
is one of the earliest things that come to mind
when creating a new blog; and sometimes how to get suitable icons and writing
the right HTML/JavaScript codes may be a problem. In this article, I’ll show
you the various ways --- which I grouped into MANUAL and ASSISTED, of putting
these icons on your blog.
METHOD I: Manual Method.
1. Get
Social Icons:
- Go to www.iconfinder.com and download icons. There may be other sites that provide free social icons; but on the aforementioned website, you’ll find icons of assorted shapes and designs --- some of them are paid while many others are free and come with creative common licence.
- All you have to do is select the icon of your choice and download it in .png or .jpeg format but not in .ico format as Blogger doesn’t support .ico images.
 |
| An Example with Facebook Icon. |
2. Upload
The Icons to your Blog:
- Go to Blogger Dashboard > New Post and upload the icons.{Using mine as an example}:


- Right click on each of the uploaded icons and copy the “image URL”.
- Paste these URLs separately on a notepad.
3. Create
the Widget:
- Open a new Tab on your browser.
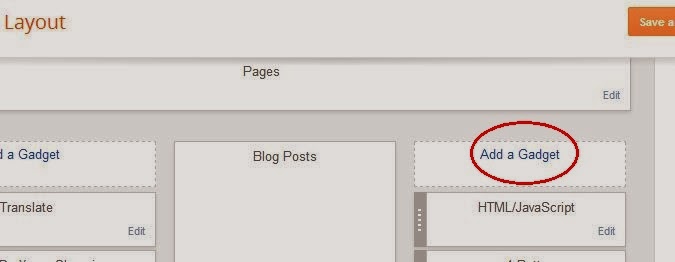
- Go to Blogger Dashboard > Layout > Add a Gadget > HTML/JavaScript.
- Copy the following codes and paste them in the HTML/JavaScript gadget. {Please Note: Generally, the codes used for a single icon are: <a href="Target URL"><img src="Image URL" width="50" height="50" /></a>. But when there is more than one icon, the codes become a bit less simple}.
COPY THESE:
<a href="https://twitter.com/YOUR TWITTER USERNAME"><img src="Twitter" alt="TWITTER IMAGE URL" title="Follow us on Twitter" width="50" height="50" /></a>
<a href="http://www.facebook.com/FACEBOOK USERNAME"><img src="FACEBOOK IMAGE URL" alt="Facebook" title="Like us on Facebook" width="50" height="50" /></a>
<a href="YOUR GOOGLE PLUS PROFILE URL"><img src="GOOGLE PLUS IMAGE URL" alt="Google+" title="Follow us on Google+" width="50" height="50" /></a>
- Remember to insert the required usernames, profile URL, and image URLs.
- You can give the widget a title, if you like.
- Then, click on SAVE.
- Go to LAYOUT and move the widget to where you want it to appear on your blog.
- Save this arrangement by clicking “Save arrangement”.

- You can now view your blog to see your handiwork.
METHOD II: Assisted Method.
- Go to https://www.addthis.com/get/follow. If you are not already logged in, log in with your Facebook, Twitter or Gmail account.
- When you are logged in, you may be surprised to see that there is no option for Blogger platform. But this is not a problem, just select “A Website”. The code that will be generated can be used on Blogger.

- Insert the required usernames in fields provided. A preview is provided on the right-hand section of the webpage.


- Customize the appearance of the selected icons by defining the “Header” and “Design”.
- JavaScript is then generated on a panel below the preview. Click on “Grab It” to copy it.
- Go to Blogger Dashboard > Layout > Add a Gadget > HTML/JavaScript and paste the code you copied.
- Click on SAVE. Move this widget to where you want it to be and save the arrangement.
No comments :
Post a Comment